Follow along with me to run pipelines from Azure Devops and GitHub Actions to demonstrate how you can use the Databricks CLI capabilities like databricks workspace import_dir and databricks bundle deploy.
I will demonstrate how these commands can run from the DevOps agent command line (and you can try it locally too) to copy files from your local or from your git repository to the Databricks workspace, to any location you specify.
Fork or clone my repository and make it your own https://github.com/clintgrove/databricks-devops
Then follow along on this video if you want.
For Asset Bundle deployments
The command line we will run is:
databricks bundle deploy
You can see this in the file .github/workflows/databricks-assetbundle.yml in my github repo.
For Non Asset Bundle deployments
The command we want to use for Azure Devops is:
databricks workspace import_dir $(Build.SourcesDirectory)/${{ parameters.notebooksPath }} /Shared/live4 --overwrite
If you are using Github Actions then it is:
databricks workspace import_dir --overwrite ${{ inputs.notebooksPath }} /Shared/live4
Where the /Shared/live4 can be any name you want, it doesn’t have to be that. Also you can put it in /Users/live or /Users/assets/notebooks if you wanted to.
You set --overwrite to make sure that you overwrite any existing files there.
Workspaces have these folders by default:
- /Users
- /Repos
- /Shared
(Note: When I used my high permissions SPN that is Contributor over my entire Subscription then I could put the “/live” folder at the root level, but when I created a SPN that had limited scope and permission then I had to put it in /Users or /Repos or /Shared.)
Prerequisites
- 2 Databricks workspaces with public access. As I have set this up to mimic a Dev to Prod type promotion
- The Databricks workspaces need to have Unity Catalog (I set Databricks up on Premium sku)
- You need access to the Account Dashboard (accounts.azuredatabricks.net)
- Clone or fork from my repository so that you can make this your own and adjust values where you need to.
Setting this up for Azure Devops
If you want to set this up like I did then you need to do a few things on Devops.
- Create your Service Connection in Azure devops (which is an app registration in Entra ID, aka a SPN (Service Principal)).
- Add the SPN to the Databricks workspace.
- Find the “Account ID” of Admin Dashboard (accounts.azuredatabricks.net).
- Create your Azure Devops Pipeline and run it.
1. Set up a “Service Connection” in Azure Devops
Go to Project Settings in Azure Devops (look down at the bottom left of the page). I set my Service Connection up manually, which meant that I already had an app registration (aka SPN) created in EntraID and then connected to that SPN as a “Service Connection” in Azure Devops. I prefer doing it that way so that I can control the app registration process instead of letting Azure Devops create one for me.
Click on “New service connection”
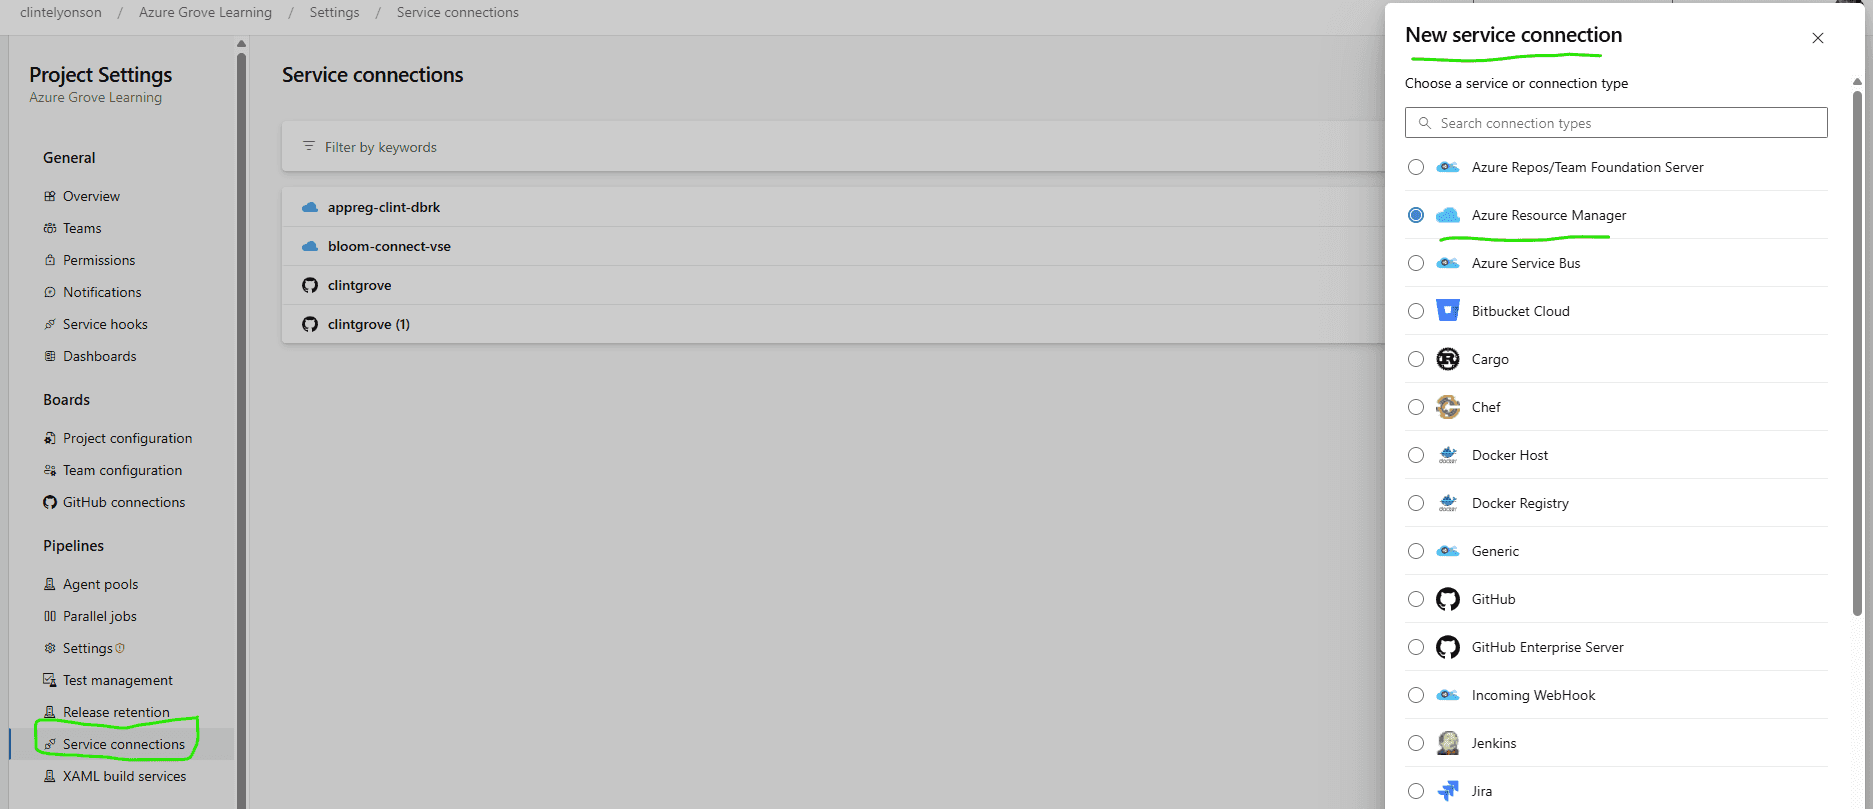
Click on the drop down for Identity Type and choose “manual” if you want to use an existing SPN (or automatic if you want to let Devops create one for you).
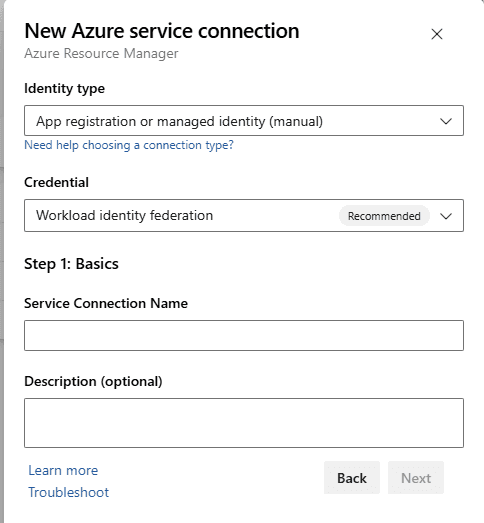
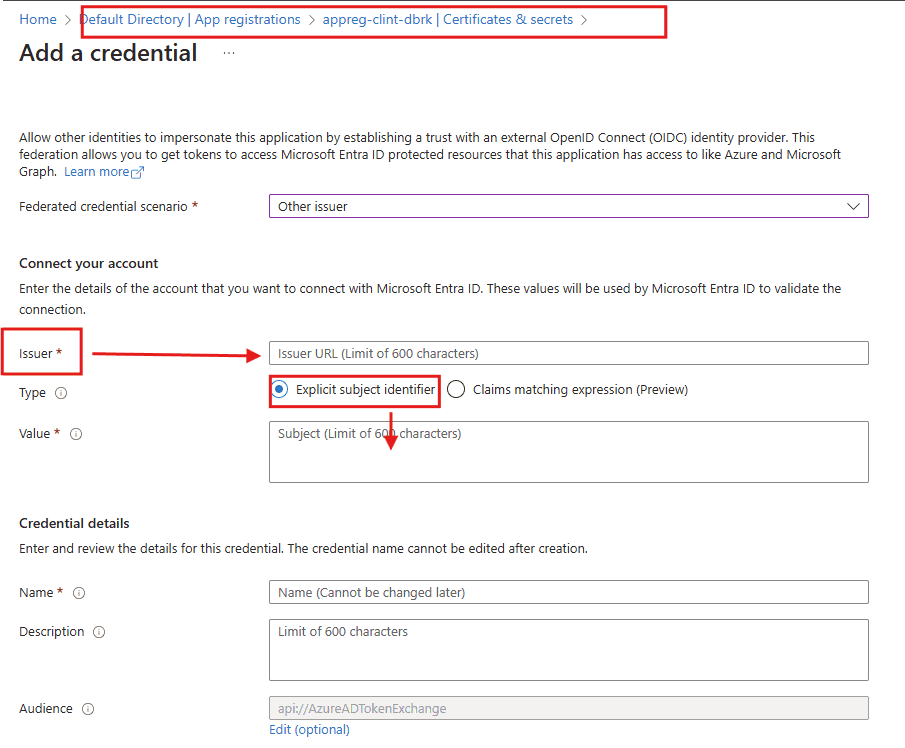
The “issuer” and the “Subject identitfier” in the next step is related to creating a federated credential on your SPN
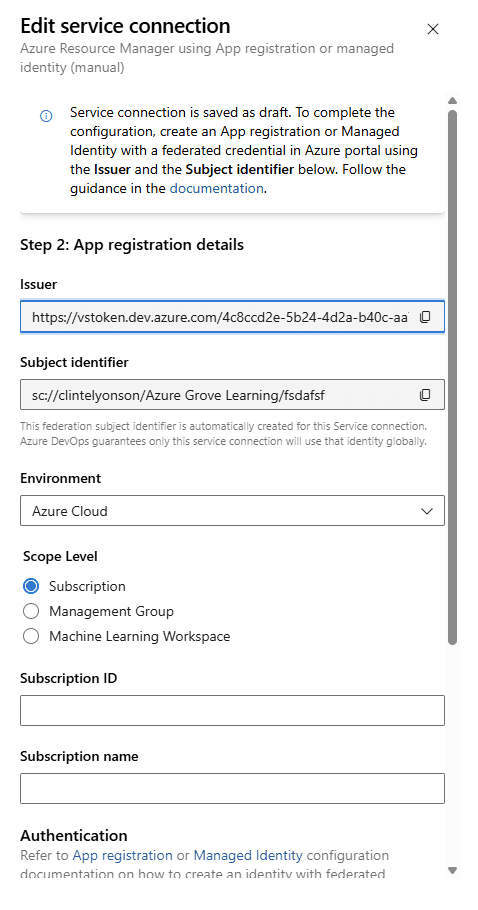
The values that this window above gives for Issuer and Subject identifier is something you need to enter into your Credentials and Secrets page of your app registraition (SPN) in EntraID. See the screenshot below for hints.
I wont go into too much detail, but here is a site that may help https://learn.microsoft.com/en-us/azure/devops/pipelines/library/service-endpoints?view=azure-devops
2. Settings for the SPN on the Databricks Workspace
You now need to create secret tokens in both dev and prod (* and save the secret in the Library groups, see point 4).
Go the Databricks dev workspace and navigate to Settings/Identity and access/Service Principals/Manage. If your SPN (Service Principal) has not been added, then add it. When adding a new SPN, you will be adding an EntraID managed principal.
You will need the Application ID of the SPN (Add the same SPN that you set up as the Service Connectionn SPN in Azure Devops).
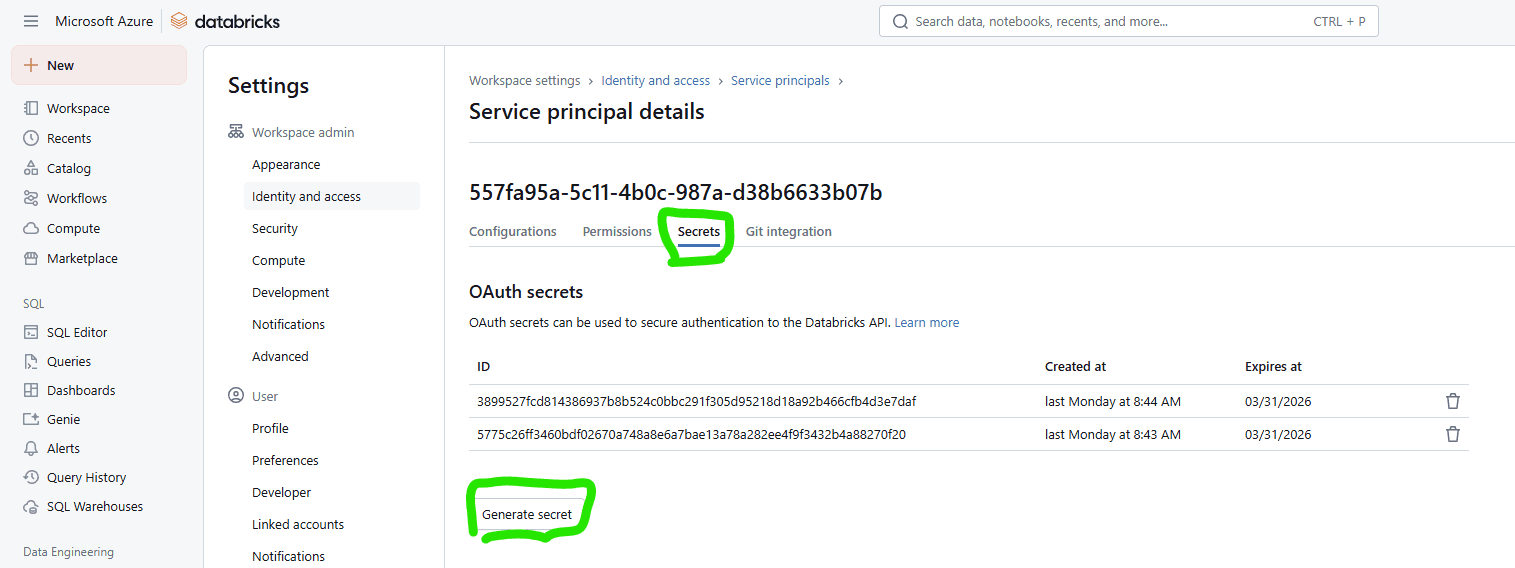
Click on the Service principal and then look for the tab “Secrets”. You need to create a secret on EACH databricks workspace, then copy that as you will need to save that secret to your Pipeline Library under the name databrickstoken-appreg-srvcondevops-dev and databrickstoken-appreg-srvcondevops-prod respectively, in the correct Variable groups (see point number 4.1 below).
Its up to your company to decide whether you will use the same SPN to promote code to both DEV and Prod. If you choose to have different SPN’s do the work, then you can easily adjust the yaml files and create secrets and service connections for the different SPN’s (See the env-variables.yml to see my set up).
For example you would have different service connection names in both dev-service-connection-name and prod-service-connection-name in the env-variables.yml file. (and in the -clientid variable).
From what I can tell there is no need to set RBAC permissions in Azure portal in the Resource goup or on the Resource (Databricks) for this to work. All you need to do is create a secret token inside the databricks workspace using the SPN, then add that secret to the Library variable and be sure to add the SPN’s app id to the env-varibles.yml for the databricks workspace in question.
3. Look for your Databricks Account ID
You will need access to accounts.azuredatabricks.net (or ask your companies admin to go to this site and get the Account ID for you)
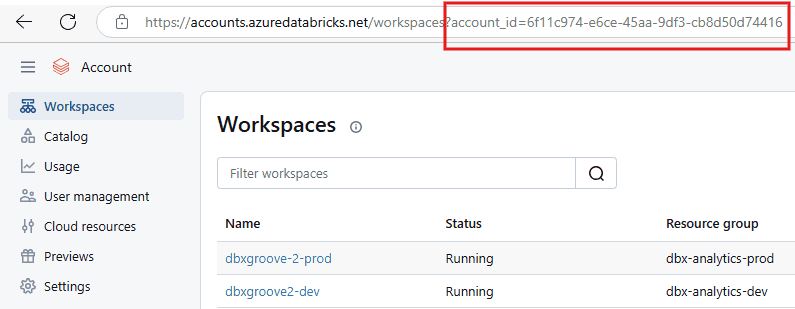
You will see the account_id=xxxxx in the URL for most pages you navigate to in the Account dashboard. Copy this ID number.
In the dbx-using-cicdtools-azdevops/env-variables.yml file, add your account ID to the variable dev-databricks-sp-accountid and prod-databricks-sp-accountid.
4. Set up your Azure Devops pipeline
4.1 Create the library and variables
You will need to create Pipeline Library variable groups named the same as mine, or adjust the code to suit the name of your libraries. (Look for - group: Dev-vars this is the name of the Library group in Devops).
Add the secret tokens that you created for the SPN’s in Databricks Workspace. My libraries are called Dev-vars and Prod-vars. Inside these libraries are the secrets databricksClientSecret: $(databrickstoken-appreg-srvcondevops-dev) (and one for prod) which I created in the Databricks workspaces.
4.2 Create the pipeline
Go to Pipelines/New pipeline. Then select Github yaml, then select the repository that you cloned/forked from my repo.
Then select “Existing yaml file” and look for the ymal file named “cicd-pipelines.yml”.
You will need to adjust the env-variables.yaml file to input your Service Connection names instead of mine.
You are now good to go and run the pipeline! Good luck.
Github actions
(Thanks to https://endjin.com/blog/2019/09/import-and-export-notebooks-in-databricks for the idea on setting up Github actions.)
Action secrets and variables
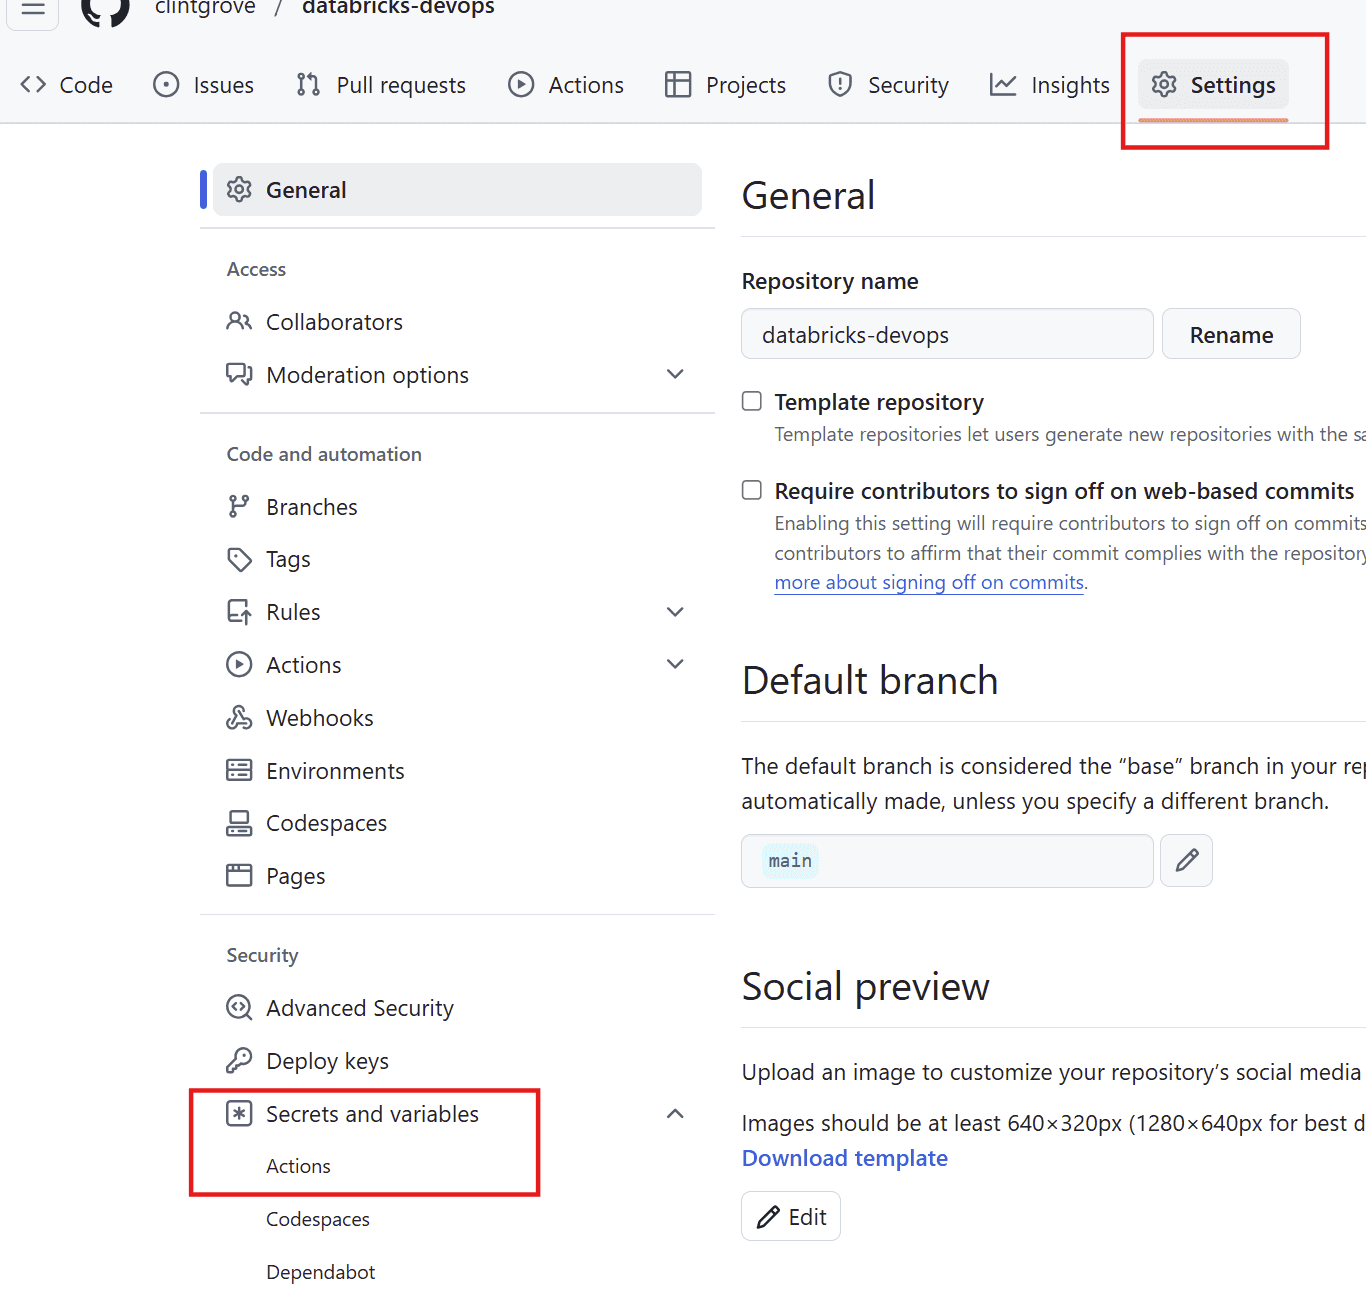
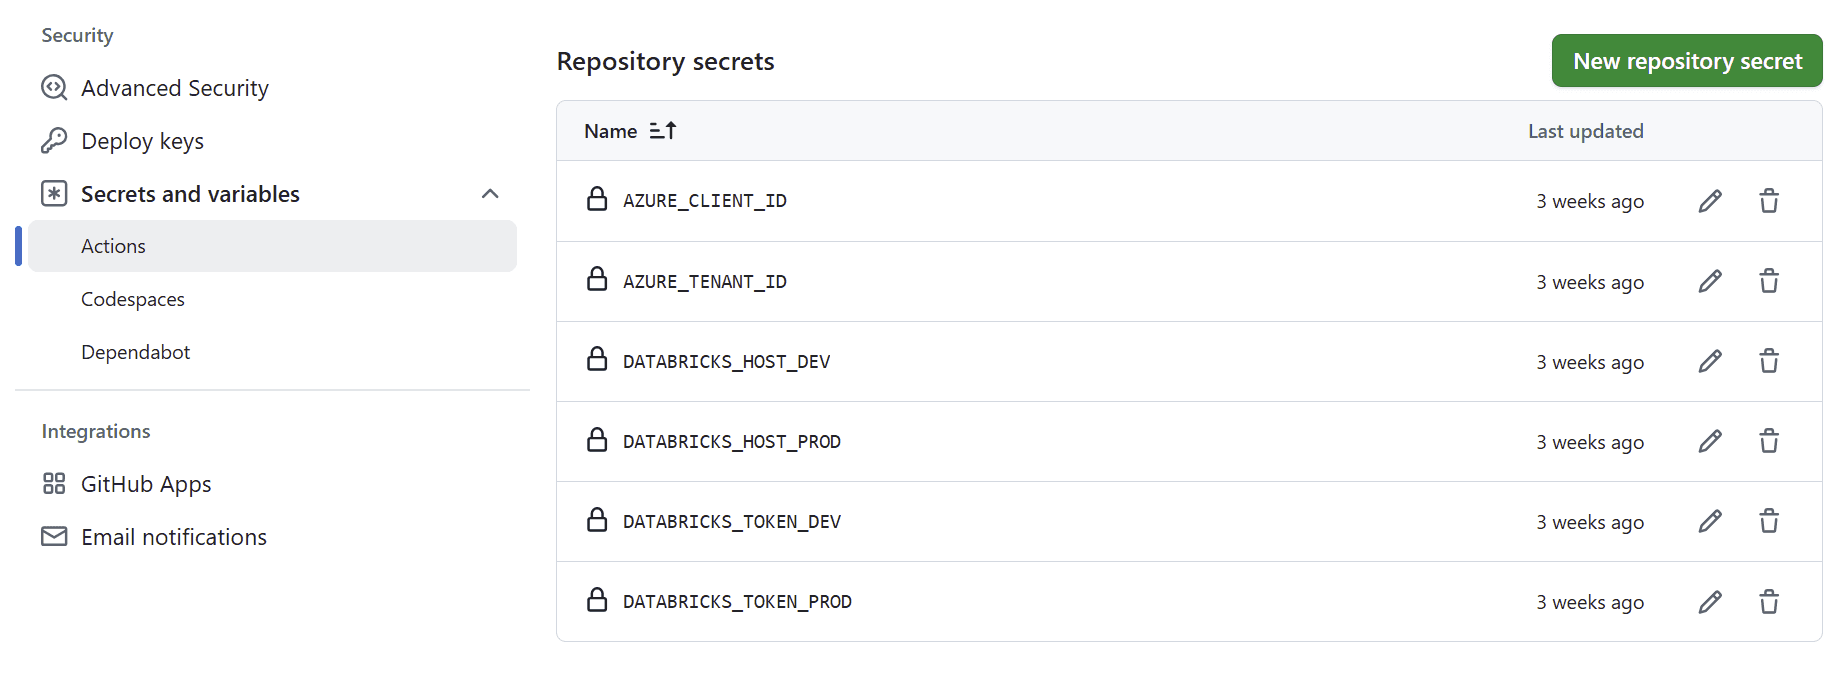
In your Github repo, navigate to Settings, then look for Security/Secrets and variables and click on “Actions”.
Gather up information on your application id (which you will set as your client_id). Find your Tenant ID by searching “Tenant properties” in Azure portal. Then add these to your Github actions like you see below
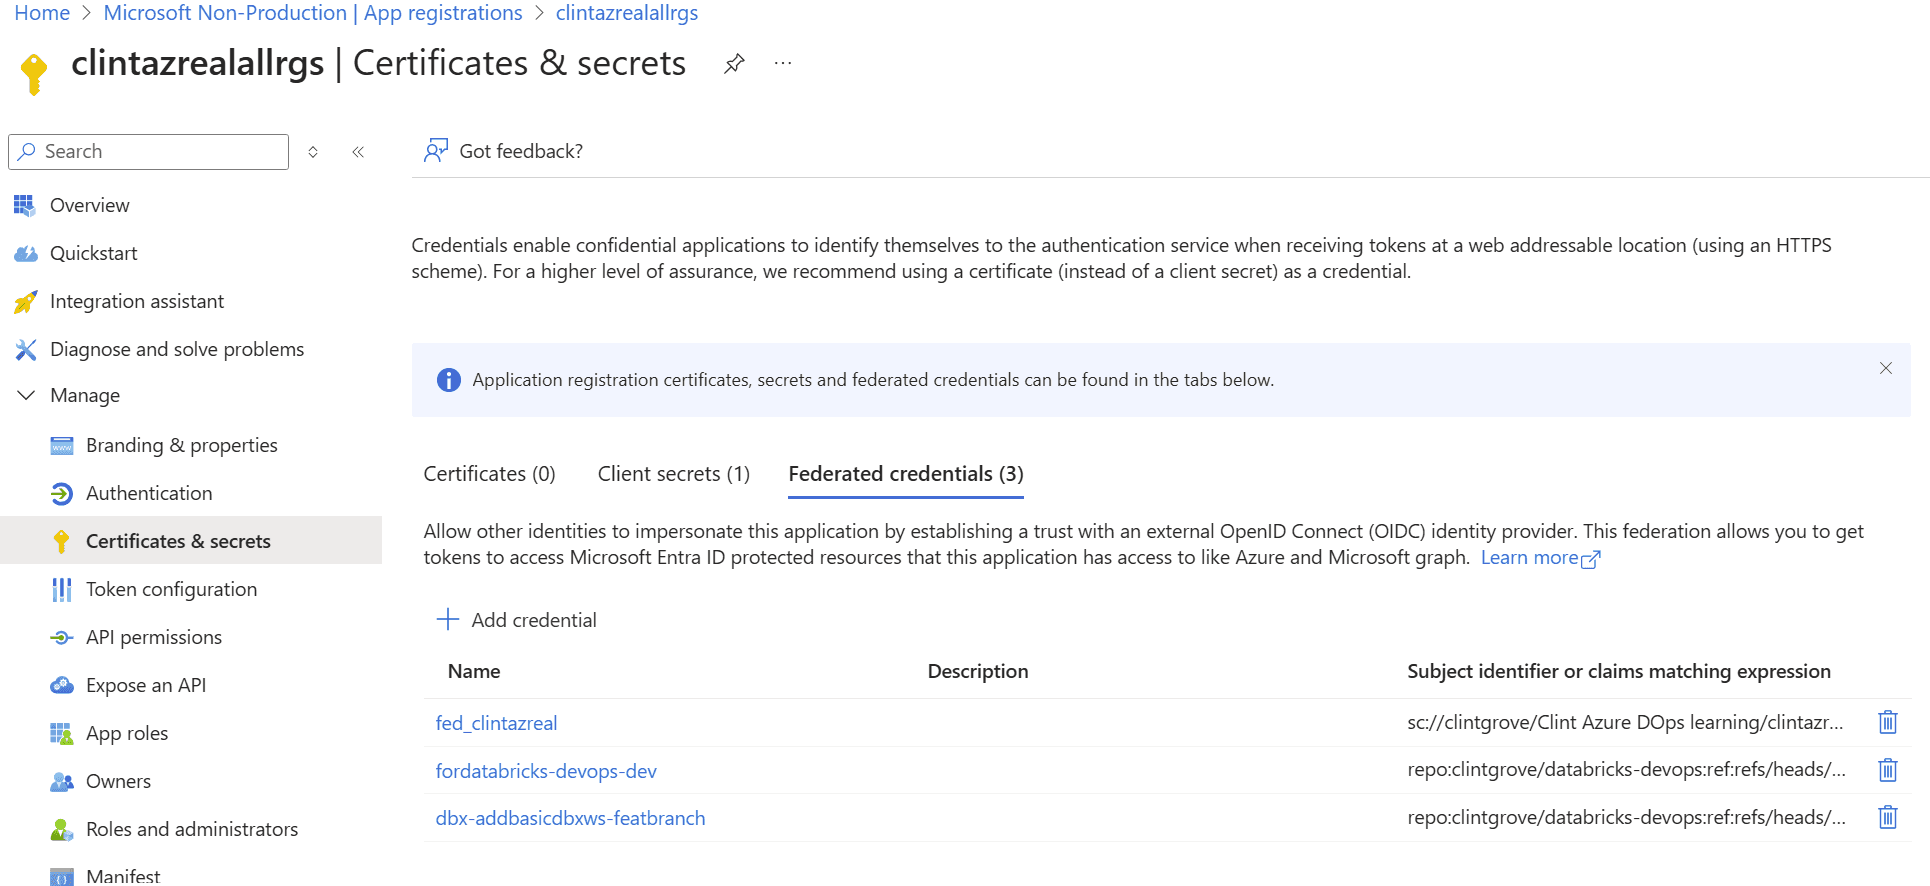
The reason you will NOT need a Client secret is because the best way to set this up is to use “Federated credentials”, which is simple to set up a handshake between your application registration (SPN) and your Github repository. Go ahead and set it up and it will look something like this.
Actions
If you have cloned or forked my repository then, when you navigate to “Actions” tab in your Github Repo, you might see that there is a “workflow” named “Databricks Notebooks Deployment”. This is the workflow associated with the deploydbx.yml file.
This is the workflow you can run without needing to set up anything else, as you would have put in the client details in the previous step.
To recap, make sure that you add all of these to the Secrets and varialbes/Actions part (this forms your repository secrets, see above step). Below is a snippet from the yaml file in this repository (deploydbx.yml). It will read from your repository secrets
    secrets:
      AZURE_CLIENT_ID: ${{ secrets.AZURE_CLIENT_ID }}
      AZURE_TENANT_ID: ${{ secrets.AZURE_TENANT_ID }}
      DATABRICKS_TOKEN : ${{ secrets.DATABRICKS_TOKEN_DEV }}
      DATABRICKS_HOST: ${{ secrets.DATABRICKS_HOST_DEV}}
Asset Bundles
Install and use VS Code Databricks plugin
If you haven’t already, see my video on how to connect to Databricks from Visual Studio Code. https://www.youtube.com/watch?v=kCgAKoMi_xw
Create a bundle project (or adjust the one in this repository)
Before you can deploy bundles you need to initialise one. Get started here first - https://learn.microsoft.com/en-us/azure/databricks/dev-tools/bundles/#develop-your-first-databricks-asset-bundle
Once you run this from within Visual studio code, it should produce a bunch of folders and files. The one that does the magic is the databricks.yml file.
You will need to adjust the values in this yaml file to suite your enviornments.
CI/CD for Asset Bundles
Now that you have your bundle you can head over to GitHub actions and start to set up the yaml file for CI/CD.
This is the yaml file you will be working with .github/workflows/databricks-assetbundle.yml
I think the only thing you will need to do is create a PAT token (I had to create one under my name, I could not get the SPN’s secret to do the work)
Create a secret for your GitHub actions and name it this DATABRICKS_TOKEN: ${{ secrets.ELYON_DBX_TOKEN_PROD }}